
Barricade Trail Force HD Front Bumper Install - Extreme Terrain
September 19, 2015
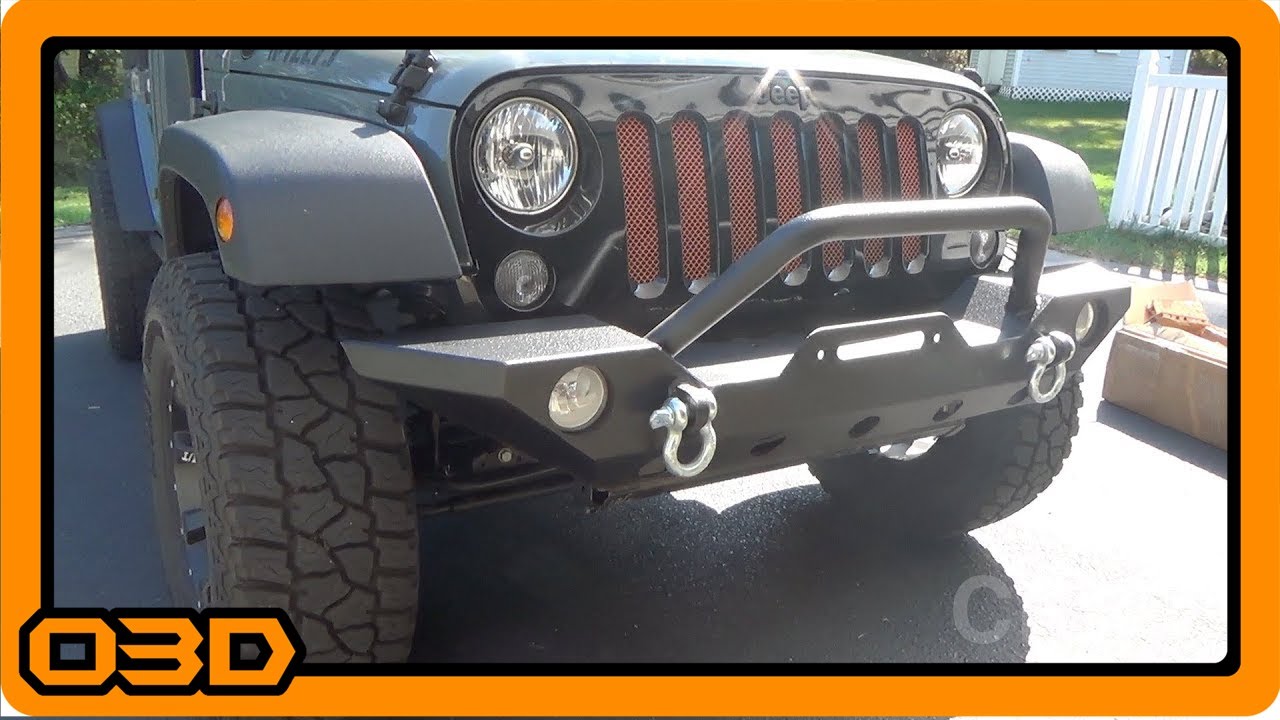
Learn how to install the Barricade Trail Force HD Front Bumper on your Jeep JK with our detailed guide.
Quick Look
Overview
If you’re looking to upgrade your Jeep JK with a robust and stylish front bumper, the Barricade Trail Force HD is an excellent choice. This guide walks you through the installation process, sharing tips and insights gleaned from real-world experience to ensure a smooth upgrade. Whether you’re a seasoned mechanic or a novice DIYer, this article will provide the clarity you need to get the job done right.
What This Covers
This tutorial includes:
- Tools and materials required for the installation
- Step-by-step instructions for removing the factory bumper
- Detailed guidance on installing the new Barricade bumper
- Tips for wiring adjustments for the fog lights
Step-by-Step Breakdown
1. Gather Your Tools
Before starting the installation, make sure you have the following tools handy:
- 18mm socket and wrench
- Ratcheting wrench (optional but helpful)
- Flathead screwdriver
- Wire loom or tape for any wiring adjustments
2. Remove the Factory Bumper
The removal process can be challenging, but it sets the groundwork for a successful installation. Here's how:
- Disconnect the fog lights by unplugging them and loosening any clips holding the wiring harness in place.
- Locate the four bolts on each side of the factory bumper. These bolts are typically an 18mm size. The bolts can be tough to reach, especially the ones that are closer to the frame and behind the vacuum pump.
- Once you have the bolts loose, make sure to leave one bolt slightly threaded to hold the bumper in place while you disconnect the last wiring harness attachments.
- With all bolts removed, you can carefully pull the factory bumper off your Jeep.
3. Prepare the Barricade Trail Force HD Bumper
Before mounting the new bumper, you need to install the factory fog lights into the Barricade bumper. Here's how:
- Thread the nuts provided into the fog light housing while the bumper is off the vehicle.
- Install the factory fog lights into the designated housings, ensuring they are oriented correctly.
4. Install the New Bumper
Now it’s time for the exciting part:
- Position the Barricade bumper onto the Jeep, aligning it with the factory mounting brackets.
- Secure it with the original factory bolts, making sure everything is tightened evenly to avoid any misalignment.
- Reconnect the fog light wiring. Depending on your model, you may need to extend the wiring harness slightly to reach the new bumper location.
5. Final Adjustments
Once everything is secured, give the bumper a firm shake to ensure it’s securely in place. Re-check all connections for the fog lights to ensure they’re working properly.
Helpful Tips
As you work through the installation, keep these tips in mind:
- Consider using a ratcheting wrench for the stuck bolts; it can save you a lot of time and effort.
- Take your time during the wiring phase—ensure everything is properly insulated to prevent any shorts or issues.
- If you're not comfortable with altering wiring, consult a professional or someone experienced in automotive electrical work.
Key Takeaways
The Barricade Trail Force HD front bumper is not just about aesthetics; it’s also designed for durability and functionality, making it a worthwhile upgrade for any Jeep JK owner. Following this guide should provide you with a straightforward approach to installing your new bumper and getting back on the trails with confidence. Whether you're conquering rocky terrains or simply looking to enhance your vehicle's style, this installation will set you up for success in your adventures!