
Changing Differential Fluid - Dana 44 Rear with Dynatrac Cover
July 24, 2017
Learn how to change differential fluid on a Dana 44 rear axle with our detailed step-by-step guide.
Quick Look
Overview
Changing the differential fluid on your Jeep is an essential task that ensures your vehicle's longevity and performance, especially following a new axle installation. In this guide, we'll take you through changing the fluid on a Dana 44 rear axle equipped with a Dynatrac cover, highlighting some key steps and tips to keep in mind during this maintenance process.
What This Covers
This tutorial will illustrate the step-by-step process of changing differential fluid, including:
- Tools and materials needed.
- Inspection and preparation steps.
- The fluid change process itself.
- Post-maintenance checks and tips.
Step-by-Step Breakdown
Before diving in, it’s essential to gather all required tools and materials. You’ll need a catch pan for the old fluid, a special 5/16” 12-point socket for the Dynatrac cover bolts, a torque wrench, the differential fluid (Amsoil Severe Gear® 75W-140, in this case), and possibly a few cleaning supplies.
1. Prepare Your Jeep
Make sure your Jeep is on a flat surface and safely secured with the parking brake engaged. Lift one rear tire and place the transfer case in neutral to make it easier to rotate the differential during inspection.
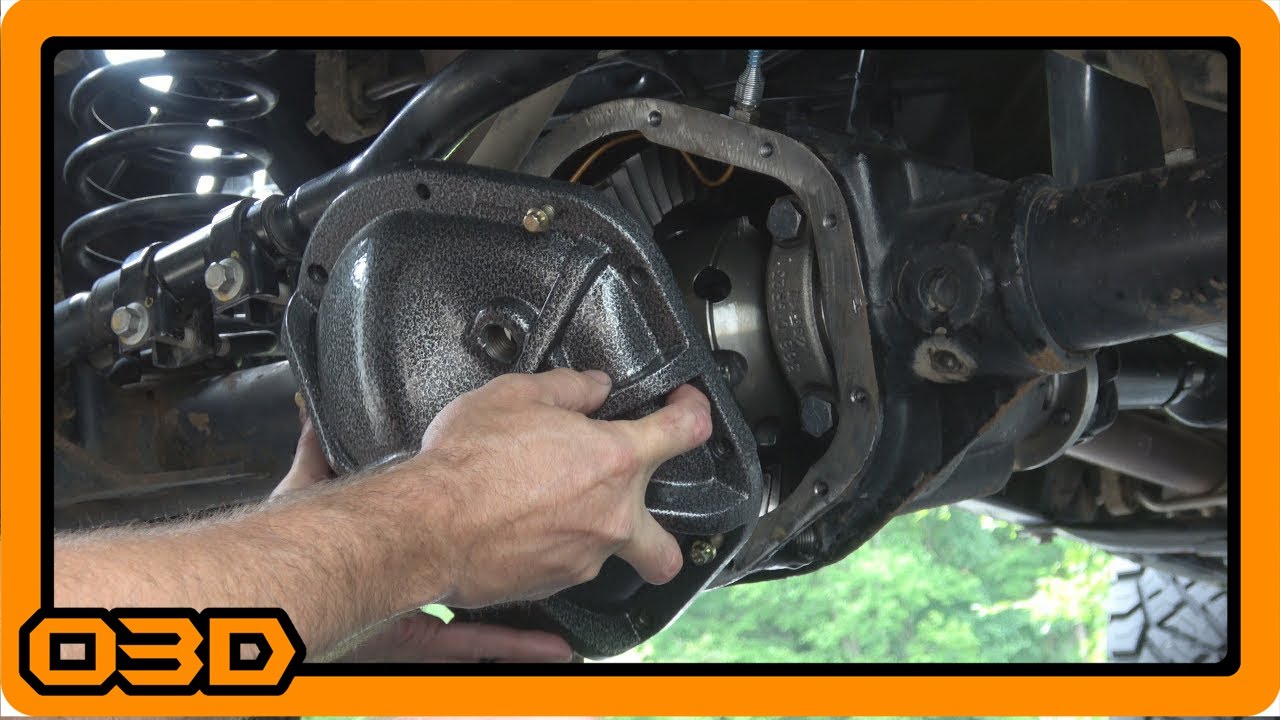
2. Locate the Drain Plug
Start by locating the drain plug on the Dana 44 rear axle. This model features a unique magnetic drain plug that helps capture metal shavings, an important step in maintaining the health of your differential.
3. Drain the Fluid
Position your catch pan under the axle and remove the drain plug. Expect some debris as this is typical during initial fluid changes after a rebuild; you want to capture any metal particles that have accumulated.
4. Inspect Internals
While the fluid is draining, take this opportunity to inspect the differential gears. Rotate the ring gear by hand and check for any signs of damage or wear.
5. Clean the Drain Plug
Clean your magnetic drain plug thoroughly to remove any collected metal shavings, ensuring it’s ready for reinstallation.
6. Replace the Differential Cover
After the fluid has fully drained, it’s time to reinstall the differential cover. Apply a generous bead of high-quality sealant (like Permatex Ultra Black) around the mating surface before securing the cover with the bolts.
7. Fill with New Differential Fluid
Using a pump, fill the differential through the top until the new fluid begins to seep out of the fill hole. This indicates that it has reached the proper level. Reinstall the fill plug securely.
8. Clean Up
Finally, make sure to dispose of the old fluid responsibly and check your work area to ensure that there are no tools or materials left behind.
Helpful Tips
As you perform your differential fluid change, consider the following tips:
- Torque your cover bolts to the manufacturer's specifications to avoid leaks.
- Always check for any signs of leaks after you’ve completed the job.
- If you're in a hurry in the future, remember that using the drain plug can simplify the process, but it won’t provide the same level of inspection.
Key Takeaways
Changing the differential fluid on your Jeep is critical for optimal performance and longevity, especially after installing new gears. Utilitarian features like the magnetic drain plug make this process easier and safer for your vehicle's internals. By following these steps and tips, you'll not only maintain your Jeep's drive train but also gain confidence and knowledge in your maintenance skills.