
Install 02 - Dash and Factory Radio Removal - Test Boot -Seicane 10.1 Android 7.1.2 Stereo Head Unit
September 9, 2017
Learn how to remove your Jeep's dash and factory radio while installing the Seicane 10.1 Android head unit. Practical step-by-step guide.
Quick Look
- This is part 2 of the installation of the Seicane 10.1 Android 7.1.2 Stereo Head Unit into OVERCLOCK3D. In this video, I show you how to remove your dash and factory radio. I also show how to remove your air conditioning vents. I then plug in the Seicane and let it boot for the first time... and test to make sure basic functionality works.
- O3DJEEPS
- Some helpful O3D Jeeps links for you:
- Some helpful O3D Jeeps links for you:
- Some helpful O3D Jeeps links for you:
Overview
Installing a new stereo head unit in your Jeep can significantly enhance your driving experience, particularly if you're looking to integrate modern features like GPS navigation and smartphone connectivity. In this tutorial, we're diving into the process of removing your dashboard and factory stereo to make way for the Seicane 10.1 Android 7.1.2 Stereo Head Unit.
What This Covers
This article will guide you through the steps necessary to safely and effectively remove your factory radio and dash panel. You'll learn about the tools required, the order of operations to minimize damage, and some helpful tips along the way.
Step-by-Step Breakdown
- Gather Your Tools: Before starting the installation, ensure you have the following tools handy: a 7mm socket wrench, a plastic trim removal tool, and a screwdriver. Having these on hand will make the process smoother and prevent damage to your interior.
- Remove the Dash Panel: Start by locating the 7mm bolt hidden beneath the rubber tray in your cup holder. Once removed, you can carefully pull the dash panel away from the dashboard. This may take some wiggling, so be patient and avoid using excessive force.
- Take Out the Air Conditioning Vents: To make the dash removal easier, you might need to take out the AC vents. Locate the little tabs at the top and gently pry them up with your trim removal tool. It’s critical to align the vent correctly to make it easier to remove without breaking any clips.
- Unplug the Wiring: As you access the components, carefully unplug any necessary wiring attached to your dash assembly. Remember to do this step by step, keeping track of where each connector goes for easier reassembly later.
- Remove the Factory Stereo: The factory stereo will have a series of screws holding it in place, which need to be removed. Unlike other stereos, the Seicane unit connects via clips rather than screws, allowing for a more straightforward installation later.
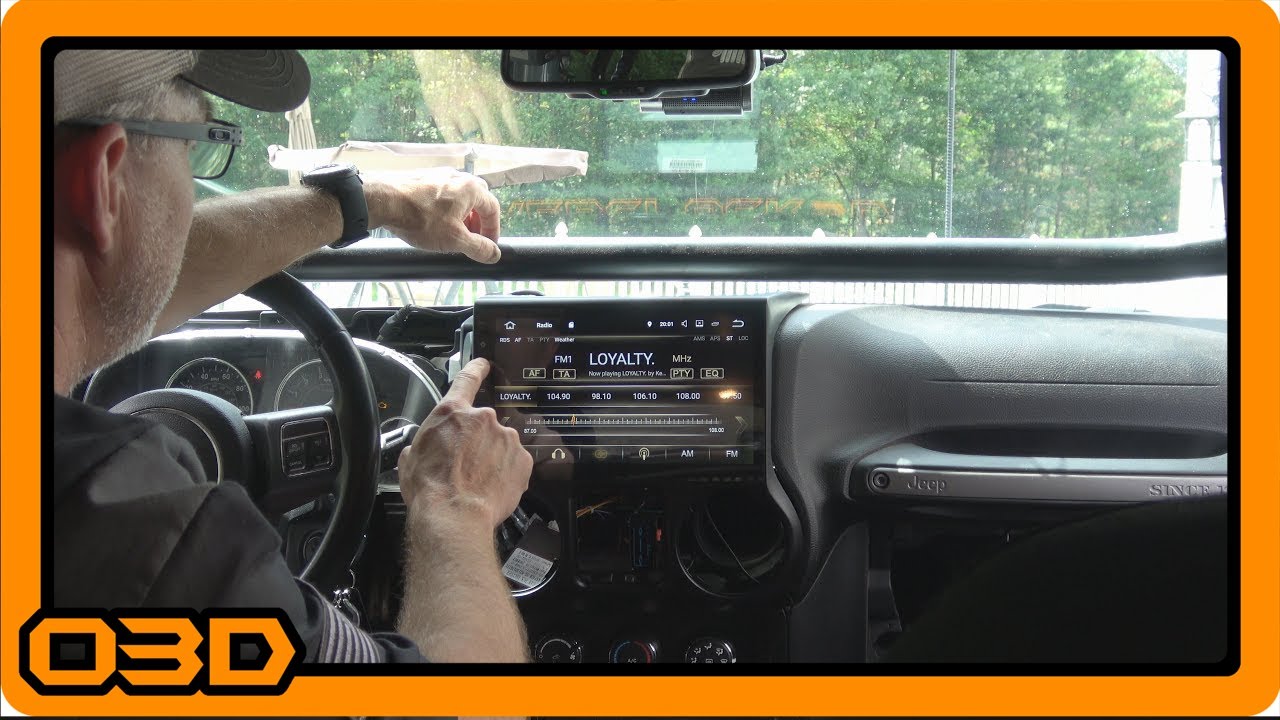
- Test the New Unit: After removing the factory stereo and preparing the wiring, plug in your new Seicane head unit temporarily. Ensure it powers on and check functionalities such as Bluetooth and GPS before finally mounting it completely.
Helpful Tips
Here are some practical tips to make your installation process easier:
- Organization is Key: Keep all screws and small parts in one container to avoid losing them during the process.
- Handle with Care: Use a plastic pry tool instead of metal to avoid scratching or damaging your dash and interior components.
- Take Your Time: Rushing can lead to mistakes and damages. Spend ample time on each step, especially when dealing with clips and connectors.
- Document Everything: Taking photos during disassembly can help you remember how to put everything back together in the correct order.
Key Takeaways
Removing the dash and factory stereo of your Jeep can seem daunting, but with the right tools and a methodical approach, it's a task that can be completed successfully. The upgrade to a head unit like the Seicane 10.1 Android can provide a much more enjoyable and tech-savvy driving experience. Remember to follow the instructions closely, and don’t hesitate to refer back to this guide as needed. Happy installing!