
JK Teraflex Leveling Kit and Spidertrax Spacer Install Part One
July 1, 2015
Learn to install a Teraflex Leveling Kit and Spidertrax Spacer on a Jeep JK with this detailed step-by-step guide.
Quick Look
Overview
In this article, we will delve into the process of installing a Teraflex 1.5" Leveling Kit and Spidertrax 1.5" Wheel Spacers on a 2015 Jeep JK Unlimited Willys. This upgrade not only improves your Jeep's stance but can also enhance handling and improve off-road capability. Whether you’re a seasoned mechanic or a DIY enthusiast looking to tackle your first Jeep mod, this guide will cover the essential steps and offer helpful tips for a successful installation.
What This Covers
This article focuses on the installation method described in the accompanying video, which emphasizes a practical, hands-on approach tailored for the average Jeep owner. We will outline the tools required, provide a step-by-step breakdown of the installation process, and highlight key considerations to keep in mind while working on your Jeep.
Step-by-Step Breakdown
- Preparation: Before you begin, gather all necessary tools including a jack, jack stands, sockets, wrenches, and torque wrenches. Familiarize yourself with the installation instructions provided by Teraflex, and ensure that you have a suitable workspace.
- Corner by Corner Method: Rather than removing all four tires and trying to lift the entire Jeep, work one corner at a time. This technique offers more stability and allows you to easily manage the components you’re working on.
- Loosening Components: Start by loosening the lug nuts on the wheel you’re working on with the tire still on. Once loosened, lift the Jeep and secure it with jack stands. This will also allow you to remove the tire easily.
- Remove Sway Bar Links: Using an 18mm and a 19mm wrench, remove the sway bar end links. This step is critical as it helps to gain extra movement in the suspension during lifting.
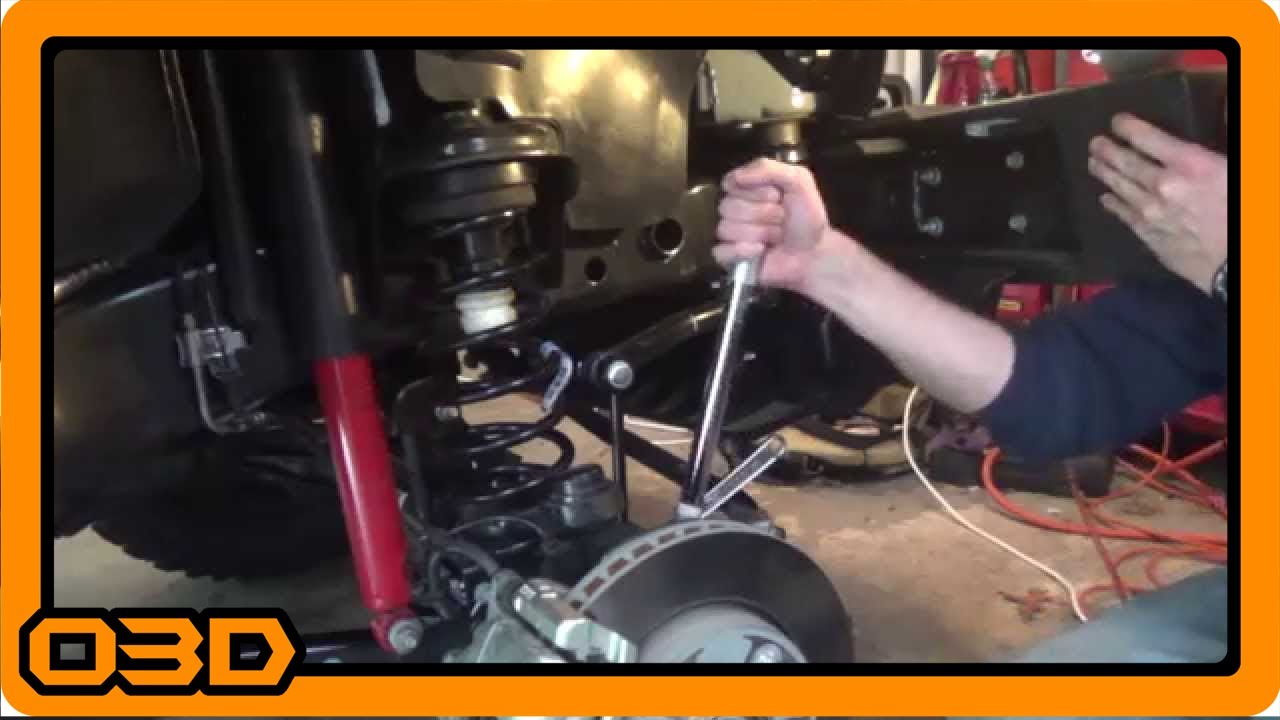
- Freeing the Shock and Control Arms: Proceed to unbolt the lower shock and control arm bolts (22mm). It’s important to loosen these components without removing them entirely, as this is essential for re-torquing them later under load.
- Spring Replacement: With the suspension unloaded, you can now easily swap out the stock spring for the new one with the isolator and spacers. Be mindful of alignment when reinserting the springs.
- Installing New Sway Bar Links: Replace the factory sway bar end links with the upgraded ones provided in the kit. Ensure to tighten them correctly according to the torque specs provided in the instructions.
- Install Wheel Spacers: Before reattaching the wheel, install the Spidertrax spacers. Make sure to use red threadlocker on the bolts and torque them to the specified inch-pounds for safety and stability.
- Final Assembly: Once everything is secured, put the tire back on and lower the Jeep. It’s helpful to double-check all connections and perform a torque check on all bolts to ensure everything is up to spec.
Helpful Tips
- Have an extra set of hands available; it can make the job easier, especially when torqueing down bolts or holding items in place.
- Keep track of your hardware. Use labeled containers for bolts and nuts, or lay them out in the order of disassembly to simplify reassembly.
- Invest in a good torque wrench. Proper torque is crucial for vehicle suspension parts to operate safely and effectively.
- Consult online forums and resources for additional tips and troubleshooting advice specifically related to your Jeep model and the components being installed.
Key Takeaways
Installing a Teraflex Leveling Kit and wheel spacers can dramatically enhance your Jeep's appearance and performance. By following the outlined steps and utilizing the right tools, even those with basic mechanical skills can achieve professional results. Remember to always err on the side of caution, double-checking torque and ensuring that all modifications are safe and sound. Stay tuned for Part Two of this series, where we will take on the rear installation and further enhance your Jeep’s capabilities on and off the road.