
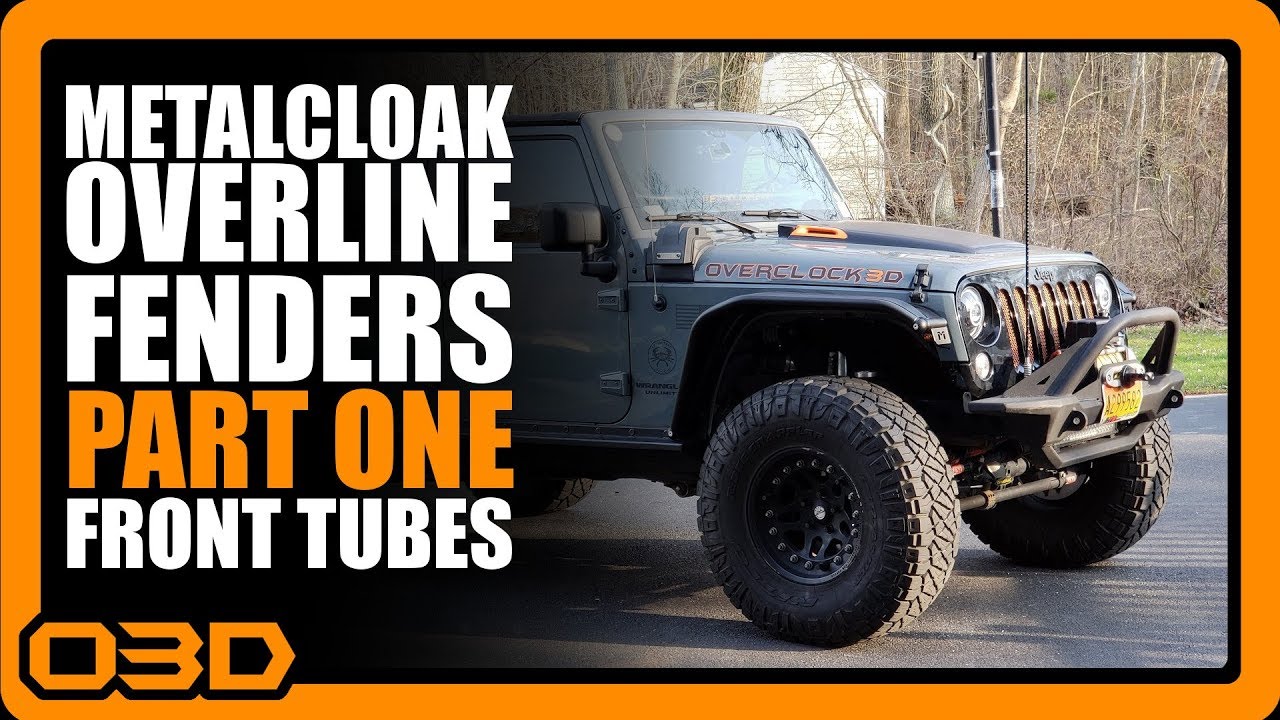
Part 1 - Metalcloak Front Overline Fender Install 2015 Jeep Wrangler JK
April 14, 2018
Learn how to expertly install Metalcloak Overline Tube Fenders on your 2015 Jeep JK with this detailed step-by-step guide.
Quick Look
- I'm installing Metalcloak Overline Tube Fenders on my 2015 Jeep JK Unlimited Wrangler. I am also installing the standard overline flares, Metalcloak inner fender liners, the rear overline fenders with exoskin, and the rear corner skins with LED tail lights.
- Easy to Install
- Ball Lock Joints secure each end of the Flare for incredible strength while providing the best Turning Clearance, best Object Deflection Angle and best Tire Clearance in the industry.
- Dovetailed for the best Object Deflection Angle, the Ball Lock Joints secure Flares for incredible strength and tub protection with just the right amount of clearance and coverage.
- Designed specifically as a mounting system for Quick Release rear flares, the flare mounting hardware is built right in.
Overview
Installing aftermarket fenders on your Jeep can drastically improve its off-road capabilities and appearance. In this guide, we're focused on the installation of Metalcloak Overline Tube Fenders on a 2015 Jeep Wrangler JK. This modification not only enhances tire clearance, allowing for larger tires, but also reinforces your vehicle's structure where it's most needed.
What This Covers
This tutorial will walk you through the process of removing the old fenders, preparing your Jeep for the new installation, and tips for making the process smoother. We’ll also discuss some specific challenges faced during the installation, particularly when integrating existing accessory modifications like a snorkel system.
Step-by-Step Breakdown
- Preparation: Start by removing the current fenders. If you have installed other fender models, like the Smittybilt XR C, feel free to refer to our prior videos for a detailed removal process.
- Assessing Your Setup: Before diving into the installation, examine potential conflicts with any aftermarket components, such as snorkels or light kits. This will help identify the adjustments needed for a seamless installation.
- Install the Front Fenders: With the factory fenders removed, position the Metalcloak tube fenders. Ensure they align correctly with existing holes where possible and mark any areas needing new holes. For maximum support, follow the manufacturer’s guidance on installing the fender support brackets.
- Drilling and Fitting: Carefully drill any new holes necessary for a snug fit. An important tip: try to drill while the fender is loosely fitted to maintain alignment throughout the process.
- Secure the Fenders: Once all holes are drilled and confirmed for alignment, tighten all bolts to secure the fenders in place. Make sure to keep some looseness in the system until each component is fitted to ensure proper clearance and adjustments can be made.
- Inner Fender Liners: If you opt for the Metalcloak inner fender liners, install them prior to tightening down the fenders fully. These liners prevent debris and mud from entering the engine compartment and protect inner components.
- Final Adjustments: Go back over all of your work, tightening bolts and ensuring all parts fit snugly without any interference from other mounted components.
Helpful Tips
- Utilize masking tape to cover areas around drill sites to prevent scratches or damage during installation.
- Keep a can of touch-up paint handy to cover any exposed metal after drilling.
- Consider removing the front grill for easier access, which can simplify the installation significantly.
- Always check for compatibility with other modifications on your Jeep to avoid unforeseen issues during installation.
Key Takeaways
Installing Metalcloak Overline Tube Fenders is a fantastic way to enhance your JK's off-road capabilities and aesthetic appeal. By following the steps outlined here, taking the time to assess your existing modifications, and utilizing some practical tips, you can achieve a successful installation that will provide lasting benefits on and off the trail. Remember, meticulous preparation and patience are key to a smooth installation process.