
Part One: Disassembly - Reid Racing Knuckles and TMR Customs 2.5 Ton Jeep JK Steering Kit Install
July 6, 2018
Follow along as we disassemble my Jeep JK to install Reid Racing knuckles and a TMR Customs steering kit, with tips for a smoother process.
Quick Look
Overview
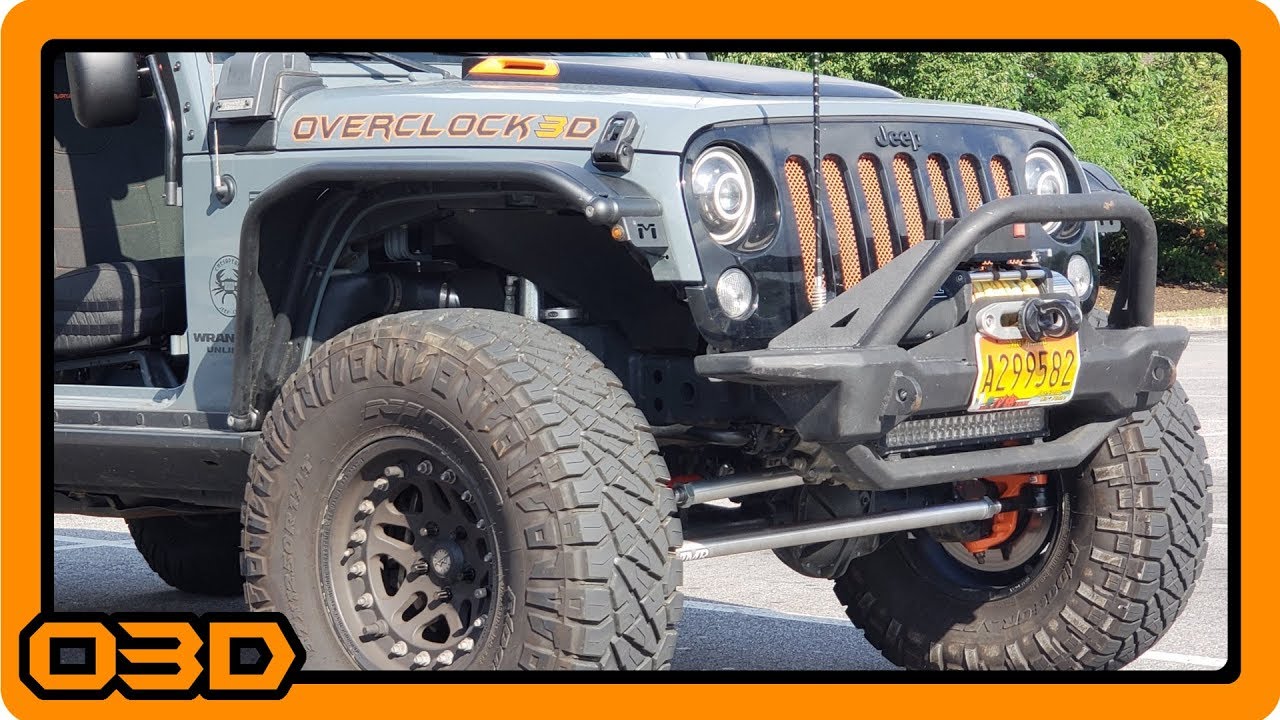
If you're looking to enhance your Jeep Wrangler JK's steering setup, you've come to the right place. Recently, I took on the challenge of disassembling my Jeep to install Reid Racing's heavy-duty knuckles and TMR Customs' 2.5-ton steering kit. This article outlines the process of disassembly, providing you with practical tips to ensure a smoother installation. So roll up your sleeves, and let's get started!
What This Covers
This tutorial will guide you through the necessary steps to remove your Jeep's existing knuckles, tie rod, and drag link. Even if you don't plan to change out the knuckles, the steps for removing the tie rod and drag link will still be highly beneficial. By the end, you'll be prepared to tackle your upgrade, armed with best practices and handy tips.
Step-by-Step Breakdown
1. Preparation
Begin your project by gathering all necessary tools, including:
- Wrenches (including 21mm, 7/8 inch, and 15/16 inch)
- Sockets (including a 12-point 13mm)
- A breaker bar
- A hammer (for ball joint separation)
- Penetrating oil (to loosen stuck bolts)
- Wood screws (for speed sensor removal)
Make sure your Jeep is on leveling jack stands or ramps for safety and ease of access.
2. Tie Rod Removal
Start with the tie rod. Loosen the nut that holds it in place, and remember that it fits into a tapered hole in the knuckle. Using a hammer to strike the tapered section allows for easy removal. This method can seem counterintuitive, but it's standard practice for separating tie rods.
3. Drag Link Removal
Next, tackle the drag link. Once you've lowered the track bar for better access, loosen the bolt securing it to the pitman arm. Use the same hammer method to free it from the arm. If the bolts begin to spin, use a wrench to stabilize the upper section.
4. Knuckle Disassembly
Your next step involves the knuckles themselves. Understand that the knuckle connects to the wheel through upper and lower ball joints. As you proceed to remove the knuckles, be cautious with the caliper bracket bolts, which often feature red thread lock, indicating they are tightly secured. A breaker bar can help tackle these stubborn bolts.
5. Removing the Wheel Speed Sensor
If you're replacing the unit bearing along with the knuckle, plan to remove the wheel speed sensor. You can either unplug it near the shock tower or gently extract it from the unit bearing itself. In the event of breakage, a quick fix involves drilling a small hole and using a wood screw to pull it out carefully.
6. Final Steps for Knuckle Removal
Finally, to disassemble the knuckle from the ball joints, start by removing the cotter pins and loosening the accompanying nuts. Here again, employing the hammer method will help release the balls when they are stubborn.
Helpful Tips
- Always work in a well-ventilated area, especially when dealing with penetrating oil or other chemicals.
- Keep track of every bolt, nut, and component you remove—organize them in containers or label them.
- If you're working in extreme heat, take breaks or work during cooler parts of the day.
- Don't hesitate to use penetrating oil on bolts that seem stubborn; allow it to soak and penetrate for a better result.
Key Takeaways
Disassembly is an essential part of any Jeep modification project. By following these steps, not only will you ensure a successful upgrade, but you'll also build your confidence in performing future modifications. Remember, every enthusiast has their tricks, so don’t hesitate to share your experiences and tips in the comments. Stay tuned for the installation video of these fantastic Reid Racing knuckles and TMR Customs steering kit to finish this upgrade!