
PART ONE Poison Spyder Body Mount Tire Carrier Installation - Overview Prep Paint
June 19, 2017
Discover the installation process for the Poison Spyder Body Mount Tire Carrier in this comprehensive overview and prep guide.
Quick Look
- 🔔 Please CLICK THE BELL if you want to see my videos! 🔔
- 🔔 Please CLICK THE BELL if you want to see my videos! 🔔
- The next video goes into the full actual assembly of the carrier, and tips and tricks I learned along the way. I'll try and point out things that the manual is unclear on, or the Poison Spyder video doesn't show you.
- Some helpful O3D Jeeps links for you:
- Some helpful O3D Jeeps links for you:
- Some helpful O3D Jeeps links for you:
Overview
In the world of Jeep modifications, the Poison Spyder Body Mount Tire Carrier is a well-regarded option among enthusiasts. This article serves as a practical guide detailing the preparation and painting process necessary for a successful installation. With the right prep work, you'll not only achieve a durable finish but also enhance the aesthetics of your Jeep along with its functionality.
What This Covers
This article covers the steps involved in preparing and painting the Body Mount Tire Carrier, as well as the tools and materials required for the job. We'll delve into helpful techniques that can make the process easier, especially for those who may not have extensive painting experience.
Step-by-Step Breakdown
Follow these steps to achieve a quality finish on your Poison Spyder Body Mount Tire Carrier:
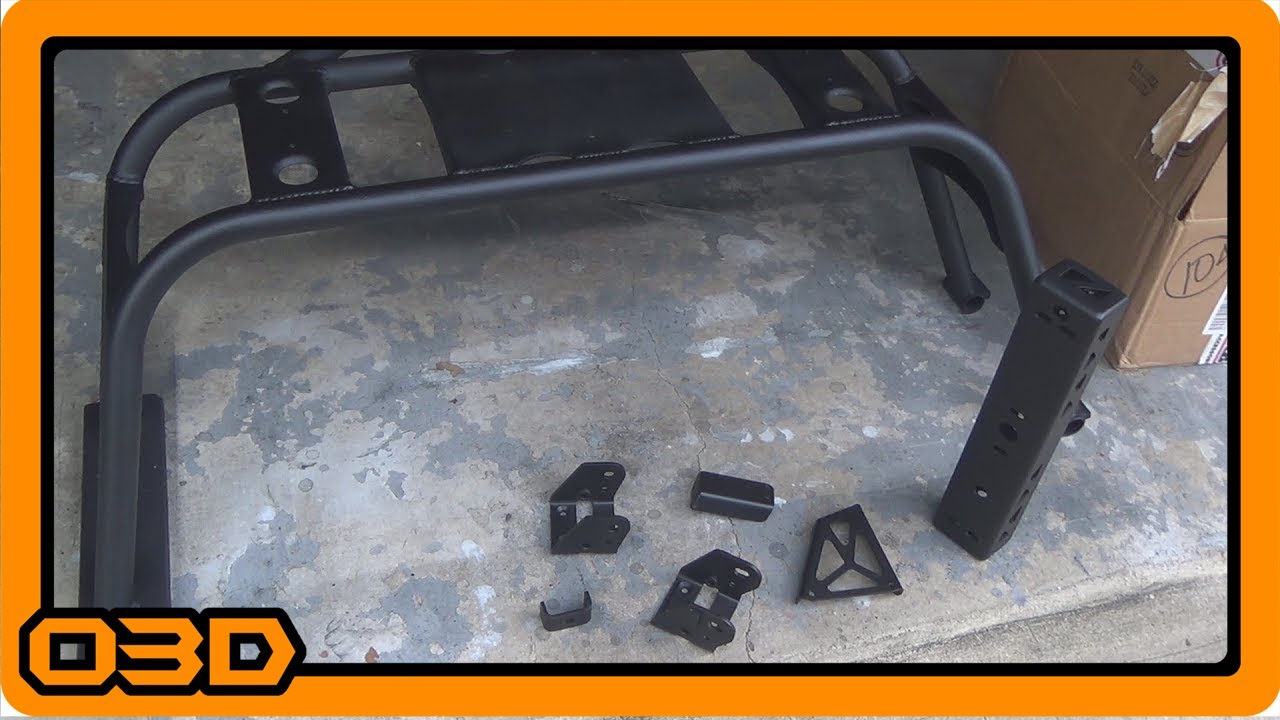
- Unboxing and Initial Assessment: Begin by unpacking the tire carrier and ensuring all components are present. The carrier comes as bare steel, which means it requires proper cleaning and prepping before painting.
- Cleaning: Utilize warm soapy water (Dawn dish soap works perfectly) to eliminate grease and contaminants from the surface. Proper cleaning is crucial for ensuring paint adhesion.
- Rust Preparation: After drying the surface, apply a rust converter like Oso. This chemical helps to neutralize any potential rust and is essential for long-term durability. Make sure to use protective gear, including a P100 mask and thick gloves during this step.
- Drying and Handling: Allow the Oso to dry thoroughly before proceeding. It’s essential to avoid touching the cleaned surfaces to prevent oils from your hands from compromising the finish.
- Painting: Choose a bedliner spray such as Dupli-Color for application, which yields a rugged texture and matches well with other frame components. Apply even coats and allow for adequate drying time. Touch-ups can be made easily if needed.
- Final Prep for Installation: Once painted and dried, ensure that all hardware is clean and ready for installation on your Jeep.
Helpful Tips
Here are some additional tips to consider during your painting and installation process:
- Always wear protective gear while working with chemicals to ensure your safety.
- If you're new to painting or prepping, don’t hesitate to seek advice in forums or from fellow Jeep enthusiasts. Experience can differ widely, and you might pick up valuable tips.
- Plan out your installation carefully. If you've got other parts or modifications planned, consider how this new carrier fits into your overall Jeep build.
- Keep your workspace organized and clean to avoid mix-ups with hardware or lost components.
Key Takeaways
The installation of the Poison Spyder Body Mount Tire Carrier can be straightforward if you take the time to prepare it properly. By following these steps and using the right materials, you can ensure a successful installation that enhances your Jeep's capability on and off the road. With the added bonus of a durable and visually appealing coating, you'll be ready to hit the trails with confidence.