
Project 2004 Jeep Wrangler TJ - Alpine Stereo Installation
May 5, 2018
Learn how to upgrade your 2004 Jeep Wrangler TJ's stereo with this Alpine installation guide.
Quick Look
Overview
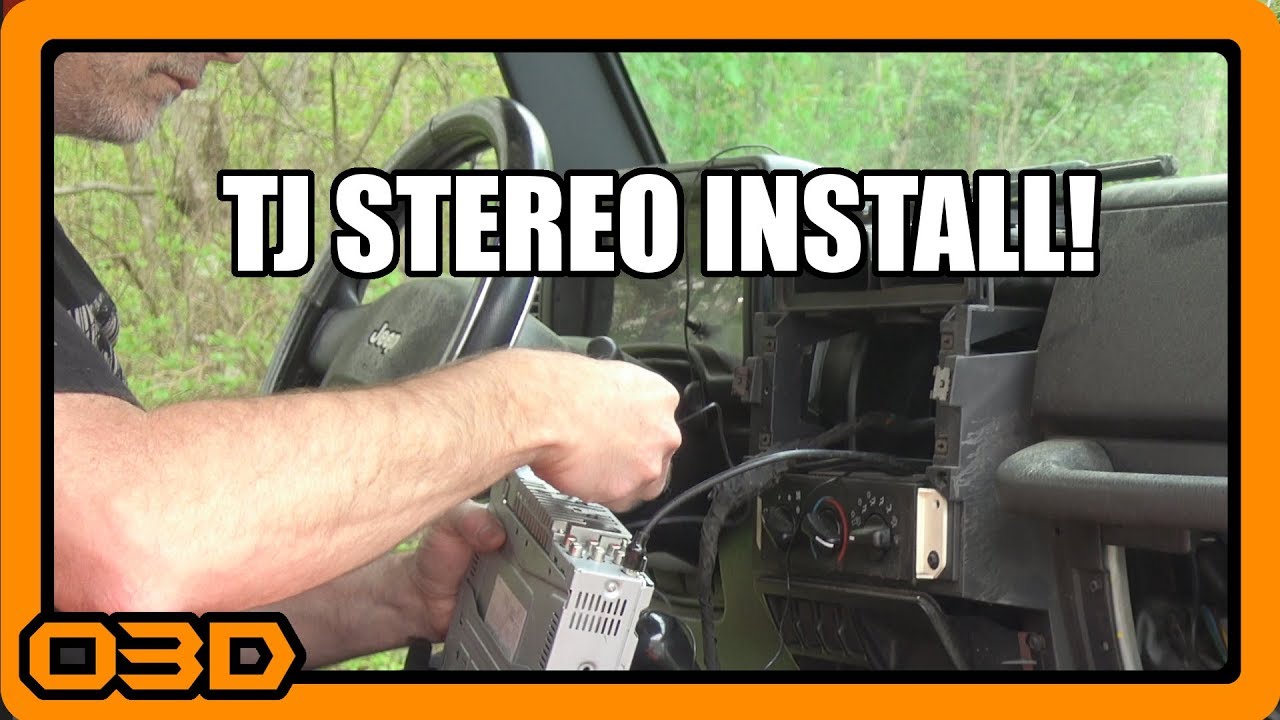
If you're looking to enhance your driving experience in your 2004 Jeep Wrangler TJ, upgrading the stereo system is a fantastic place to start. This tutorial will guide you through the process of installing an Alpine stereo head unit, a great option to modernize your rig with Bluetooth capabilities for streaming music directly from your phone.
What This Covers
This article will cover the necessary steps to successfully install the Alpine stereo, including the tools you'll need, tips for a smooth installation, and common challenges you might encounter along the way. Our goal is to empower you to improve your vehicle’s technology with confidence.
Step-by-Step Breakdown
- Gather Your Tools and Materials: Before you dive into the installation, ensure you have all the necessary tools. You’ll need a wrench set, wire strippers, an antenna extension, and any adapters that may be compatible with your Jeep's wiring system.
- Remove the Factory Stereo: Start by taking off the trim surrounding the factory stereo. This often requires careful prying to avoid damaging the dashboard. Once exposed, you'll need to disconnect the factory unit. If your stereo has a mounting bracket, remove it as it may impede the new deeper unit from fitting properly.
- Install the Antenna Extension: Since the Alpine unit needs a longer antenna, make sure to install the extension correctly. It's better to have an extension that's too long than too short, as a poor connection could lead to poor radio reception.
- Connect the Alpine Head Unit: Wire up the new unit according to the instructions provided with your stereo. Make sure to secure all connections to avoid any loose terms that could cause sound issues later on.
- Secure the Amplifier: The Alpine unit might come with an amplifier. Ensure that this is neatly secured behind the dashboard with adequate ventilation, as it will need to operate without overheating.
- Test the System: Once everything is connected and secured, turn on your Jeep and test out the stereo. Check for Bluetooth functionality, sound quality, and ensure all features are working as expected.
- Final Touches: After confirming that everything is functional, proceed to reattach any trim pieces, ensuring that nothing is left loose that could rattle while driving.
Helpful Tips
- Watch a few different video tutorials on stereo installation for varied perspectives and methods.
- Consider labeling your wires as you disconnect them to ensure you reconnect them correctly.
- If you're not comfortable with wiring, don't hesitate to consult with a professional or a knowledgeable friend.
Key Takeaways
Upgrading your Jeep Wrangler’s stereo can significantly enhance your driving experience, especially with features like Bluetooth streaming. By following this guide and taking your time with the installation, you can ensure that your new Alpine stereo integrates seamlessly into your Jeep. Remember, each step is crucial, and double-checking your work will lead to a successful and enjoyable audio upgrade.