
Rapto Worx Aluminum JK Grab Handles Install - Front, Center, Rear
June 2, 2017
A comprehensive guide on installing Rapto Worx aluminum grab handles for your Jeep JK and JKU.
Quick Look
Overview
Installing grab handles in your Jeep JK or JKU can enhance both functionality and accessibility, making it easier to enter and exit your vehicle, especially on rough terrain. In this tutorial, we’ll walk through the installation of the Rapto Worx aluminum grab handles, which provide a robust and stylish solution compared to traditional options like paracord or nylon handles.
What This Covers
This article will detail the step-by-step process of installing front, center, and rear aluminum grab handles. We’ll also highlight some key features and benefits of these grab handles as well as tips to ensure a smooth installation experience.
Step-by-Step Breakdown
- Gather Your Tools: For this installation, you will need a few basic tools: a 10mm and 13mm socket, a ratchet or wrench, and a sharp knife to open any packaging.
- Open the Packaging: The grab handles come well-packaged in sealed plastic bags. Be careful when opening them to avoid any scratches or damage.
- Prepare the Handles: First, take the grab handles out and attach the standoffs. For the driver's side front handle, use the provided bolts to secure it temporarily without tightening all the way.
- Remove Factory Bolts: Head into your Jeep and remove the two factory bolts located near the top corner of the windshield with a 13mm socket. Keep these bolts in a safe place for potential future use.
- Install the Front Handle: Position the new grab handle in place and, using the provided stainless steel hardware, secure it without overtightening yet, as it may require adjustment.
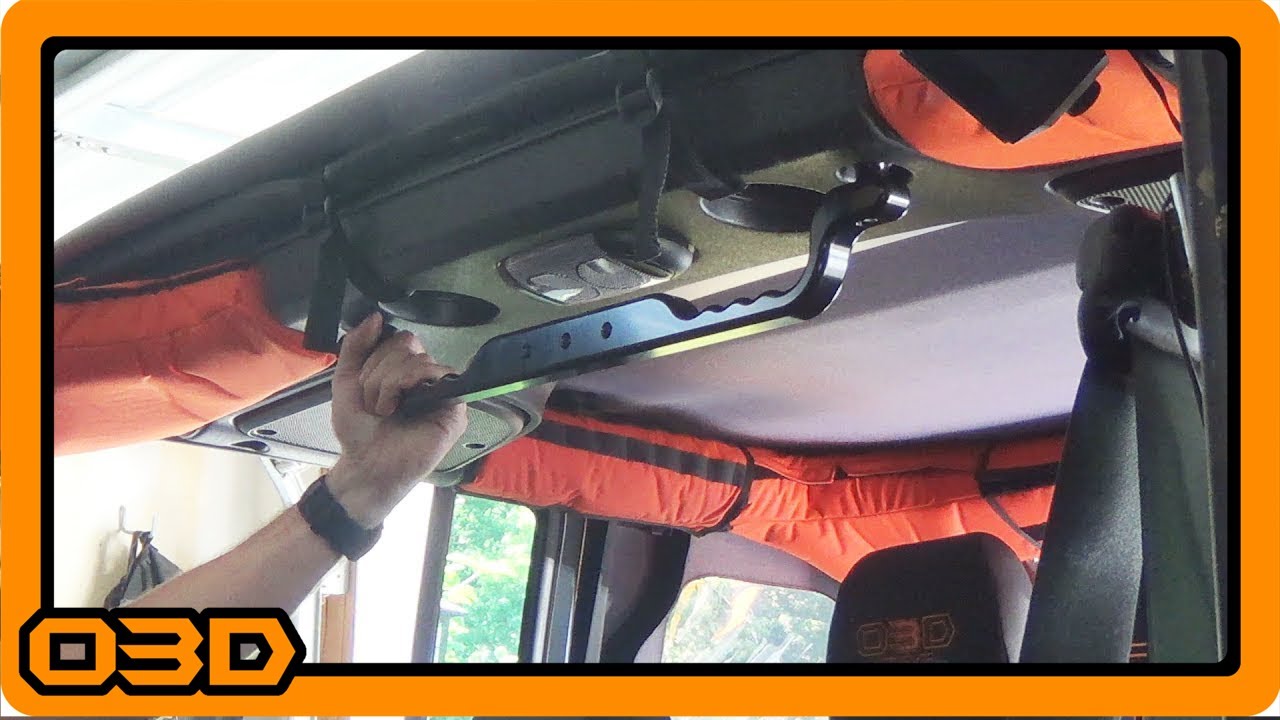
- Center Grab Handle Installation: Move on to install the center grab handle by removing the two factory bolts located on the center bar above the front seats. Replace these with the new handle, making sure to secure it just snugly for now.
- Rear Grab Handle Installation: Lastly, tackle the rear grab handles. Similar to the front installation, remove the existing bolts and replace them with the new handles' hardware.
- Final Adjustments: After installing all handles, make final adjustments by snugly tightening all bolts while ensuring you do not cross-thread any of them.
Helpful Tips
- Always read the provided instruction sheet that comes with your grab handles; there’s useful information about bolt sizes and installation specifics.
- Utilize a rubber mat to catch any small bolts or hardware that may drop during the installation process.
- Apply a drop of oil to the threads of your bolts; this can help prevent cross-threading and aid in easier installation.
- Consider the color options available to match your Jeep's interior style; while black is classic, colorful anodized options can enhance your look.
Key Takeaways
The Rapto Worx aluminum grab handles are not just sturdy and functional but also add a touch of style to your Jeep’s interior. With easy installation steps and high-quality materials, they are perfect for anyone looking to upgrade their Jeep JK or JKU. By following this guide, you’ll get them installed in no time and ready for your next off-road adventure.