
Smittybilt XRC JK Fender Flares - Part Three
November 7, 2015
Learn how to effectively install Smittybilt XRC fender flares on your Jeep JK with practical tips and techniques.
Quick Look
Overview
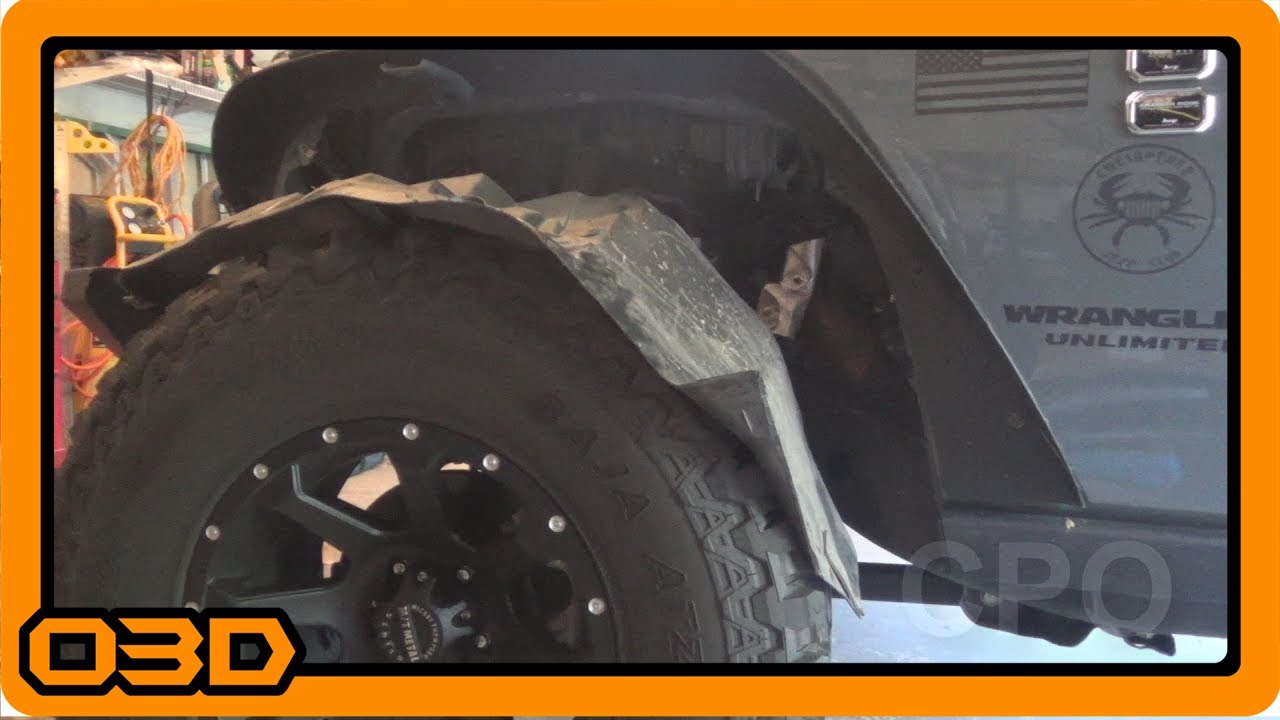
In this third installment of our series on Smittybilt XRC Fender Flares for the Jeep JK, we dive into the re-installation of the fender liners after the flares have been successfully mounted. This process ensures that your Jeep not only looks great with its new flares but also maintains essential protection against moisture and debris.
What This Covers
This tutorial will cover the steps required to properly install the front fender liners following the installation of the Smittybilt flares. We’ll highlight necessary tools, cutting techniques, and how to secure the liners effectively. Proper installation is not just about aesthetics; it can also impact the longevity of your Jeep’s components.
Step-by-Step Breakdown
To start, let’s outline the process:
- Remove Existing Clips: Begin by detaching the clips that hold the fender liner in place. A specialized clip removal tool can be beneficial, but a flathead screwdriver can also get the job done efficiently.
- Cut the Fender Liners: After removing the factory components, the next step is trimming the fender liners to fit the new flares. It’s crucial to cut them to the suitable length so they align with the body lines. Use a quality tool such as a Japanese flush cut saw for clean cuts.
- Reinstallation: Install the fender liners by utilizing existing bolt holes and adding washer support. Make sure the liners are not too tight against the flares to avoid pulling them out of place.
- Securing the Fixtures: After positioning the liners, ensure that all bolts and washers are secured tight enough to prevent any rattling or movement while driving off-road.
- Final Touches: Once everything is secure, re-check all bolts and ensure that the fender liners are seated correctly before taking your Jeep out for a spin.
Helpful Tips
Here are some additional tips to ensure a smooth installation:
- Measure Twice, Cut Once: Before making any cuts, double-check your measurements against the new flares to avoid any mishaps.
- Use the Right Tools: Investing in decent cutting tools can save you time and energy. A Japanese flush cut saw can be particularly useful for precision work.
- Monitor for Fitment: As you install, check to ensure that there's a balance between snugness and flexibility—too tight can cause stress, while too loose will lead to rattles.
Key Takeaways
Installing new fender flares like the Smittybilt XRC series on your Jeep JK can transform its appearance and off-road capability. By following the steps outlined above and applying some handy tips, you can ensure a durable and clean installation. Remember that paying attention to the fender liners not only enhances aesthetics but also safeguards your Jeep from debris and moisture, ultimately prolonging its lifespan and performance.